
Projects & Recordings
Every recording lives in a project on the Conversations page. This page is the reference for what all projects have in common: how they are created and configured, what you can upload, how transcription progresses, and what to do when it fails.
For what to do with the transcripts afterwards, see the Conversation Analysis Guide (interviews and focus groups) or the Call Center Analysis Guide (call recordings).
Creating a project
Section titled “Creating a project”- Click Conversations in the left navigation
- Click New Project
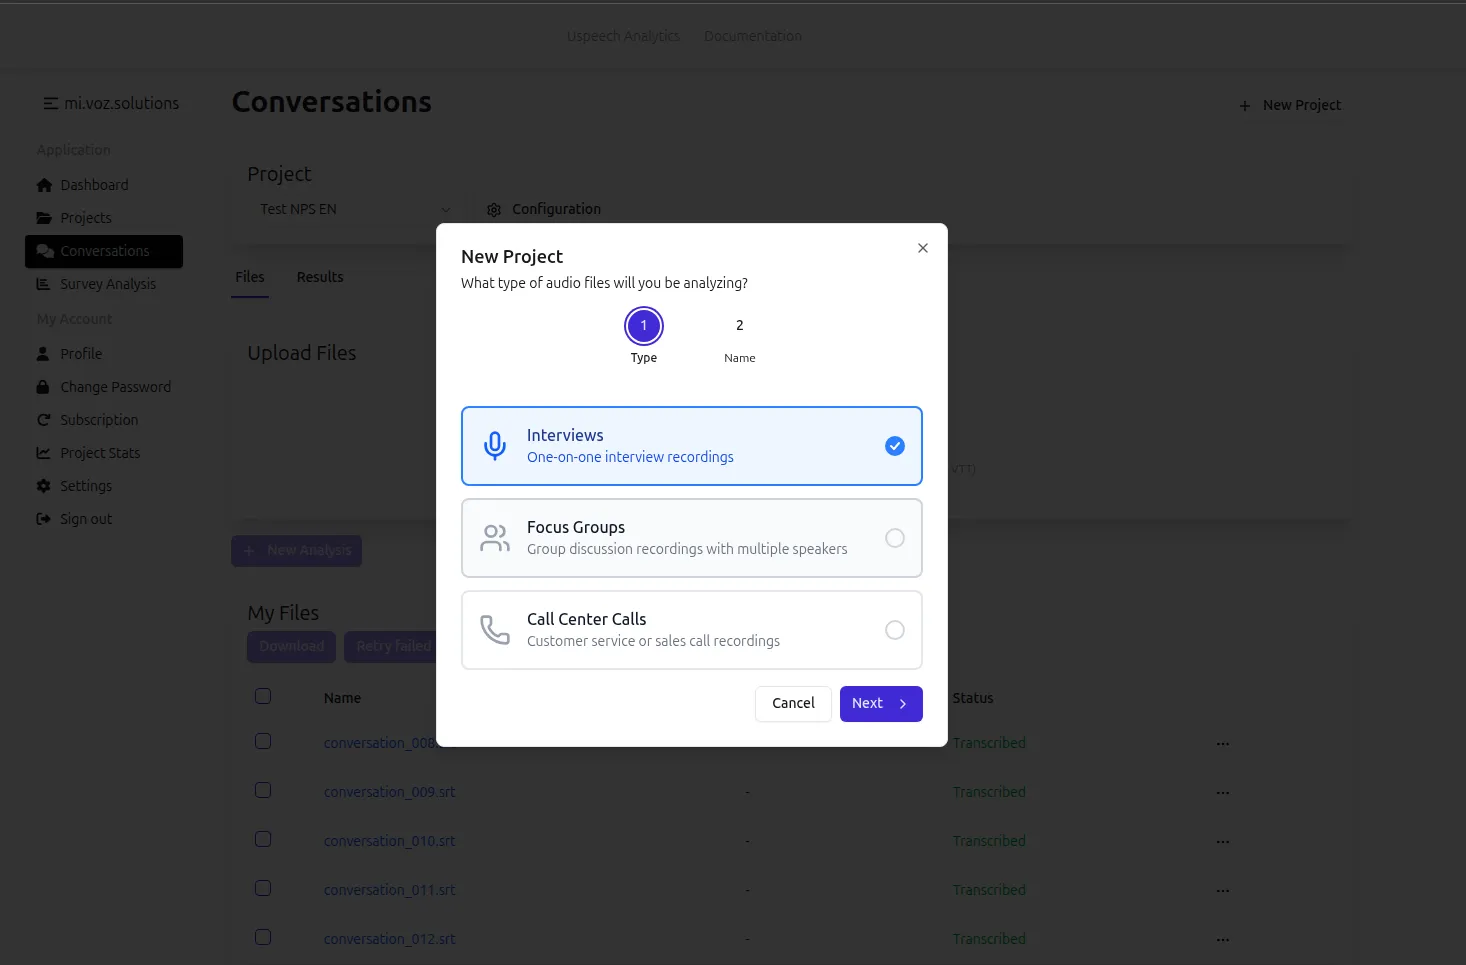
- Answer “What type of audio files will you be analyzing?”
- Click Next, enter a Project Name and click Create
| Audio type | In the wizard | Use it for |
|---|---|---|
| Interviews | One-on-one interview recordings | Interviews with one participant; analyzed with the Conversation Analysis Guide |
| Focus Groups | Group discussion recordings with multiple speakers | Group discussions; adds the Per Speaker analysis scope |
| Call Center Calls | Customer service or sales call recordings | Contact center calls; unlocks COPC Evaluation, Calls Analysis, call metadata, automatic analysis and the Call Center Report — see the Call Center Analysis Guide |
Project Settings
Section titled “Project Settings”Open the project and click Configuration. The Project Settings dialog has two parts: “Transcription settings cannot be changed after a project is created.”
Fixed at creation
Section titled “Fixed at creation”These are greyed out, so you can check what the project was created with:
- Audio File Type — the audio type chosen in the wizard
- Language — always Auto: the language is detected automatically, including recordings that mix languages
- Return Timestamps — always on. Timestamps are what let you jump from a quote in an analysis result to the moment in the transcript
Changeable at any time
Section titled “Changeable at any time”Edit these whenever you like and click Save.
Delete audio recordings after (days) — recordings are erased permanently this many days after upload. Transcripts and analysis results are kept, so past work stays readable after the audio is gone. Leave the field empty to follow your team’s retention policy.
Transcribe recordings on private infrastructure only — recordings are processed by a speech recognition service operated by Uspeech and never sent to a third-party provider.
- Transcription may take longer
- A recording that cannot be processed privately fails rather than being sent outside
- Your team can require this for every project, in which case the checkbox is on and locked, with a note explaining why
Number of speakers — appears once private transcription is on. It tells the recognizer how many people are on the recording instead of leaving it to work that out.
| Option | When to use it |
|---|---|
| Detect automatically | The number varies between recordings — interviews with a second participant, focus groups, calls that get transferred |
| 1–10 speakers | Every recording in the project has the same number of voices |
Stating the count is both faster and more reliable: left to itself, the recognizer can split one voice across two speakers. Call projects default to 2 speakers.
Private transcription and the speaker count apply to new transcriptions only — recordings already transcribed are unaffected.
Automatic analysis (call projects only) — Call Center Calls projects also carry Analyze calls automatically as they arrive. See Automatic Analysis.
Uploading recordings
Section titled “Uploading recordings”Open the project’s Files tab and drag files onto the upload area, or click it to pick them. Transcription starts by itself — there is no button to press after uploading.
Supported files
Section titled “Supported files”| Kind | Formats | What happens |
|---|---|---|
| Audio | MP3, WAV, M4A, AAC, OGG, FLAC, WebM, WMA | Transcribed automatically |
| Video | MP4 | The audio track is extracted and transcribed |
| Transcripts | SRT, VTT | Imported as they are — no transcription, ready for analysis |
Other video formats (MOV, AVI…) are not accepted — convert them to MP4 or extract the audio first.
Limits
Section titled “Limits”- Minimum duration: 10 seconds. Shorter recordings — ring-only, beep-only or empty phone-system exports — fail with Audio too short and are not billed.
- A bitrate of at least 16 kbps is recommended for reliable results.
Billing
Section titled “Billing”- Audio is billed by its duration once transcription finishes, regardless of how many analyses you run on it afterwards.
- Uploaded transcripts (SRT, VTT) are billed by the duration their timestamps cover, only when they are first analyzed. In a call project with automatic analysis, that is as soon as they are queued for it.
To be emailed when your uploads finish, turn on Notify job completion in your Profile.
File statuses and actions
Section titled “File statuses and actions”The Status column on the Files tab shows where each file is:
| Status | Meaning |
|---|---|
| Uploaded | Received, transcription not started — usually because the subscription had no minutes left at upload time |
| Transcribing | Being transcribed. This typically takes about 1/8 of the audio’s length |
| Transcribed | Done — the transcript can be opened, downloaded and analyzed |
| Failed | Something went wrong; when the reason is known it appears under the status: Audio too short or No speech detected |
Call projects can also show Automatic analysis skipped — quota exceeded or Automatic analysis failed under the status.
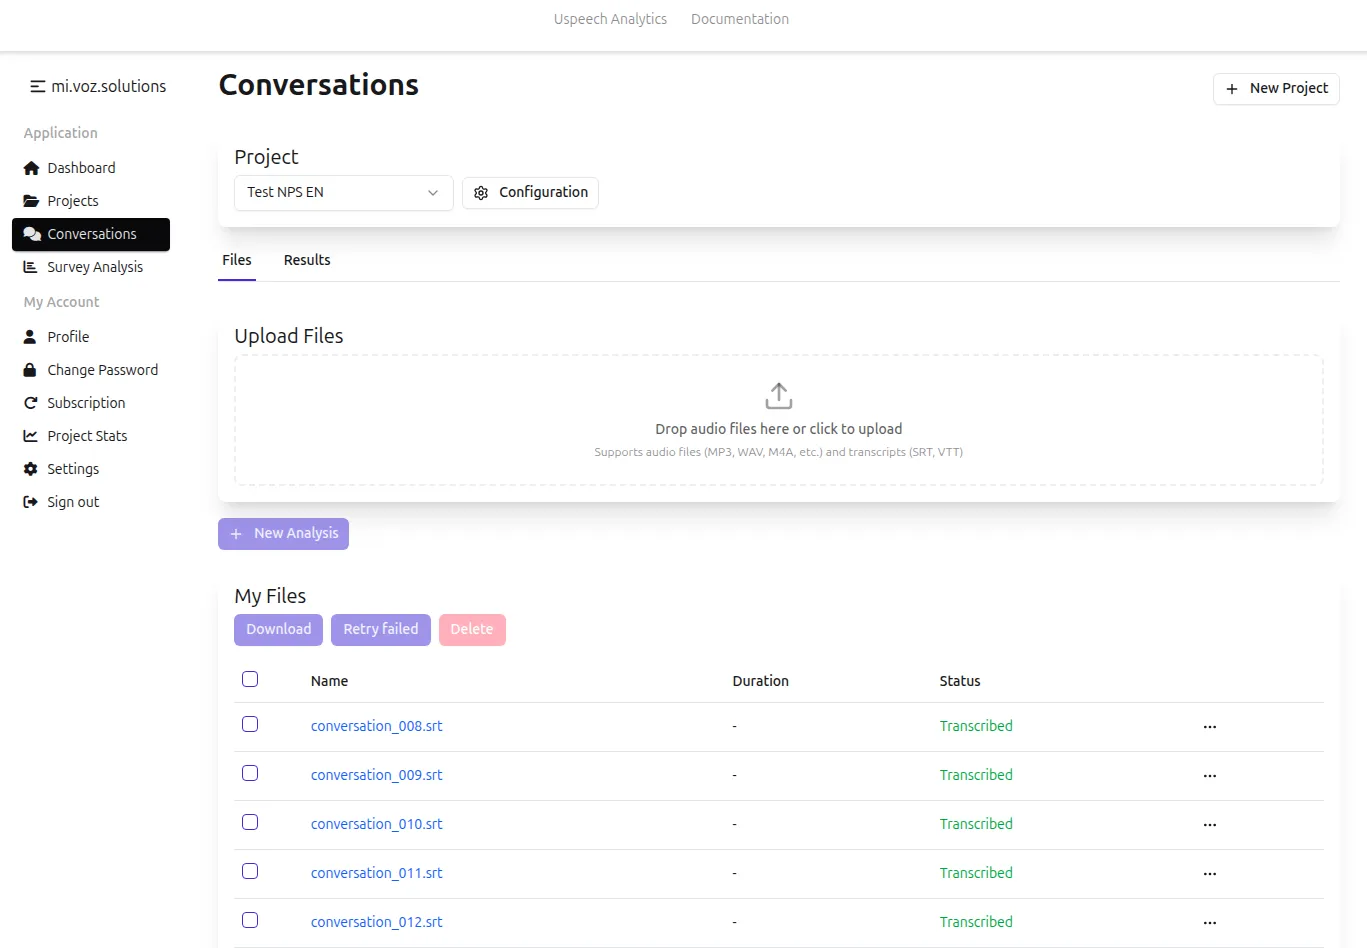
The ⋯ menu next to each file offers:
| Action | When it appears |
|---|---|
| Transcribe | The file is Uploaded but transcription did not start |
| Retry transcription | The file is Failed |
| Download → Word (DOCX) or VTT | The file is Transcribed |
| Edit call metadata | Call projects only — see Call Metadata |
| Delete | Always |
When the subscription has no minutes left, Transcribe and Retry transcription read (quota exceeded) and are disabled.
Select several files with the checkboxes to Download, Transcribe or Delete them together.
Transcripts
Section titled “Transcripts”Click the name of a Transcribed file to open its transcript. It is a table with one row per speaker turn:
| Column | Shows |
|---|---|
| Turn | The turn’s number in the conversation |
| Time | When the turn starts and ends in the recording |
| Speaker | Who is speaking |
| Text | What was said |
Speakers are identified automatically. Labels are consistent within a file — the same speaker keeps the same label throughout — but not across files.
Transcripts are read-only in the app. To correct or annotate one, download it in Word format.
Downloading transcripts
Section titled “Downloading transcripts”- One file — ⋯ → Download → Word (DOCX) or VTT
- Several files — select them, click Download and choose the Export Format. Every selected file must be Transcribed, and each one downloads as its own file.
Getting good recordings
Section titled “Getting good recordings”Transcript quality drives everything built on it.
When recording
- Use a decent microphone and position it so every speaker is audible
- Minimize background noise — background music and noise noticeably reduce accuracy
- Make a short test recording to check levels first
Before uploading
- Trim long silences and irrelevant sections
- Prefer common formats — MP3 or M4A work best
- Normalize the volume if speakers are much louder or quieter than one another
After transcription
- Read a few transcripts before analyzing a large batch — the AI is accurate, not perfect
- Check the speaker split — similar voices and overlapping speech are where it goes wrong
- Note specialized terms and names the recognizer gets wrong; they explain odd analysis results later
Troubleshooting
Section titled “Troubleshooting”Transcription is taking a long time
- Long recordings take proportionally longer, and private transcription is slower than the default
- Very poor audio needs more processing
A file stays Uploaded
- Transcription did not start, usually because the subscription had no minutes left. Once minutes are available, use ⋯ → Transcribe
Poor accuracy
- Check the audio is clear speech with little background noise or music
- Check the recording is genuinely in speech the recognizer can hear — not a hold line or a voicemail greeting
Speakers not identified correctly
- Very similar voices may be confused, and overlapping speech or very short turns can be attributed to the wrong speaker
- Set Number of speakers in Project Settings when every recording has the same number of voices
A file won’t upload
- Check the format is in Supported files. Convert other formats to MP3
Failure reasons
Section titled “Failure reasons”| Shown under Failed | Cause | What to do |
|---|---|---|
| Audio too short | The recording is under 10 seconds, usually an empty or ring-only export from a phone system | Check the exported recording; re-export the call if a real recording exists. Retrying will not help |
| No speech detected | The audio contained no usable speech, so the transcript was discarded rather than invented | Confirm the recording is audible and contains speech. Re-uploading the same audio gives the same result |
| No reason shown | A processing error, or private transcription was temporarily unavailable | ⋯ → Retry transcription. If it fails again, contact support |