Quick How-To
Quick How-To
Section titled “Quick How-To”How to Run Conversation Analysis Using Predefined Methodologies
Section titled “How to Run Conversation Analysis Using Predefined Methodologies”-
Prepare your transcripts
- Transcribe your audio files first (see Transcriptions Guide)
- Or upload existing text transcripts
-
Select files for analysis
- Click Conversations on the navigation bar
- Choose your project from the dropdown box
- In the Files tab, select the files you want to analyze using the checkboxes
-
Start the Analysis Wizard
- Click the New Analysis button
- In Step 1, choose Predefined Analysis
-
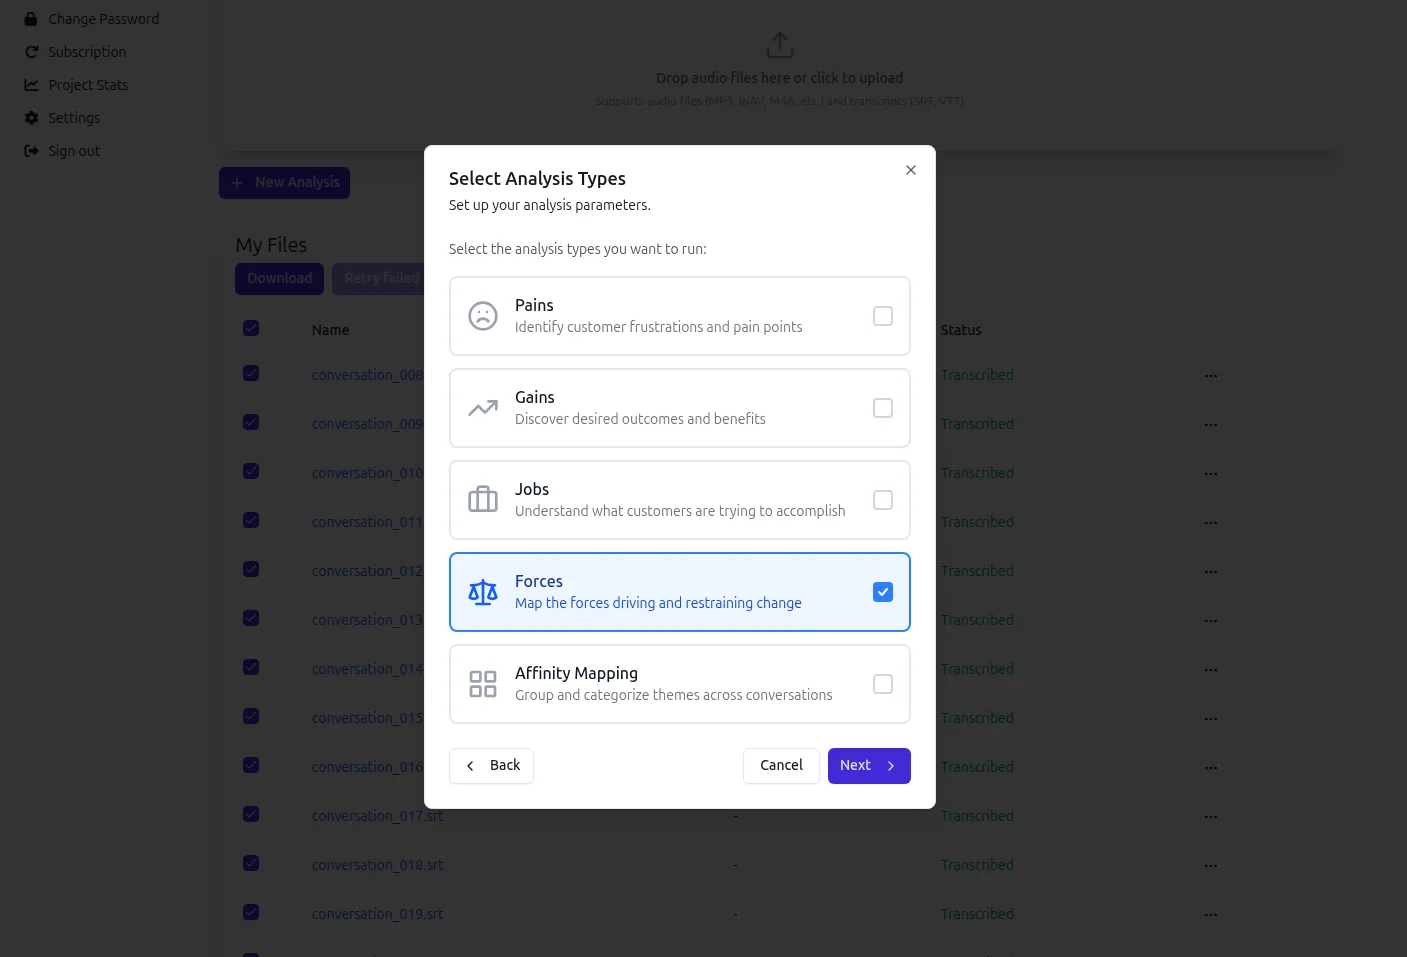
Choose analysis types
- In Step 2, select one or more analysis types using the checkboxes (e.g. Pains, Gains, Jobs, Forces, Affinity Mapping)
- For Call Center Call projects, Calls Analysis is also available
-
Choose analysis scope
- In Step 3, choose how to analyze the selected files:
- All Conversations — analyze all files together as a single batch
- Per Conversation — analyze each file individually
- Per Speaker — analyze by speaker (available for Focus Group projects only)
- In Step 3, choose how to analyze the selected files:
-
Add context (optional)
- In Step 4, you can provide additional context or instructions in the Additional Context field
-
Run the analysis
- Click Start Analysis to begin processing
How to Run Custom Conversation Analysis
Section titled “How to Run Custom Conversation Analysis”-
Prepare your transcripts
- Transcribe your audio files first (see Transcriptions Guide)
- Or upload existing text transcripts
-
Select files for analysis
- Click Conversations on the navigation bar
- Choose your project from the dropdown box
- In the Files tab, select the files you want to analyze using the checkboxes
-
Start the Analysis Wizard
- Click the New Analysis button
- In Step 1, choose Custom Questions
-
Choose question source
- Choose either Enter questions or From template
- If Enter questions is chosen:
- Enter your questions in the text area. You can add as many questions as needed.
- If From template is chosen:
- Select a template from the dropdown (see Templates & Codes Guide)
-
Choose analysis scope
- Choose how to analyze the selected files:
- All Conversations — get answers across all conversations combined
- Per Conversation — get answers for each conversation individually
- Per Speaker — get answers by speaker (available for Focus Group projects only)
- Choose how to analyze the selected files:
-
Add context (optional)
- You can provide additional context or instructions in the Additional Context field
-
Run the analysis
- Click Start Analysis to begin processing
How to Review the Results
Section titled “How to Review the Results”- Review results
- Analysis typically takes 1-5 minutes depending on transcript length
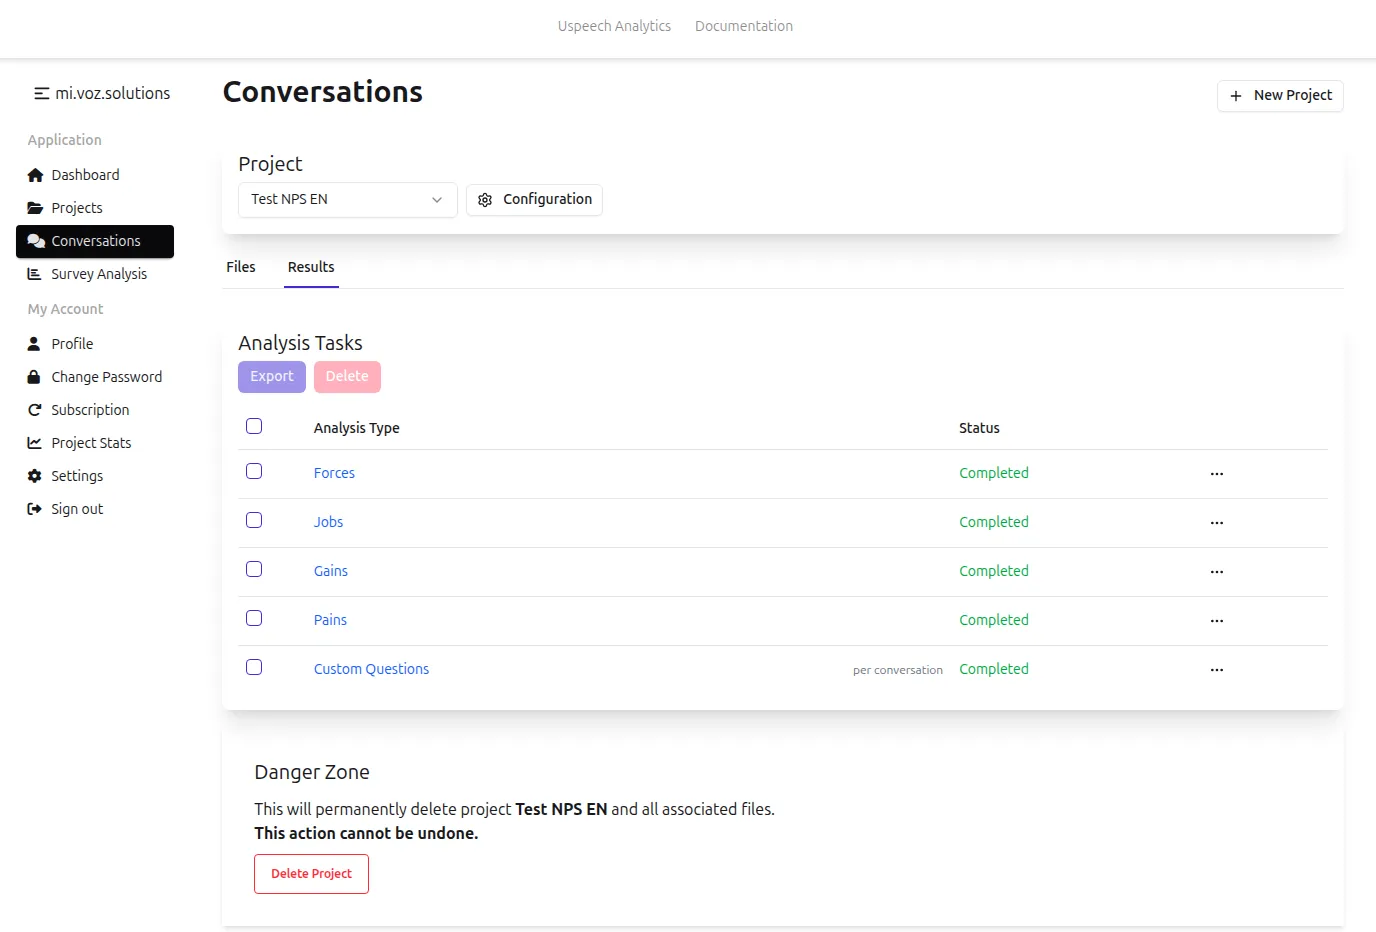
- Switch to the Results tab to see the status of your analysis tasks
- Once complete, the status will change to “Completed”
- Click on a completed analysis task to view the results
- Results show categorized insights with supporting quotes
- For “Custom Questions” analysis, you can see the answers to your specific questions
- If Per Conversation or Per Speaker scope was chosen, you’ll see separate tabs with answers for each conversation or speaker, with supporting quotes
- You’ll also see a codification tab showing stats for the main answer categories across all conversations
💡 Tip: You’ll get an email notification when the analysis process is finished. In order to enable email notifications, go to Profile, check “Notify job completion” and click Save.
- Export findings
- Check one or more analysis tasks to export
- Click Export and choose from Word (DOCX), Excel (XLSX), or PowerPoint (PPTX)