Quick How-To
⏩ Quick How-To
Section titled “⏩ Quick How-To”How to Set Up and Run Google Forms Survey Analysis
Section titled “How to Set Up and Run Google Forms Survey Analysis”-
Create a Survey Analysis project
- Click Survey Analysis in the navigation bar
- Click New Project
- Choose Create from scratch

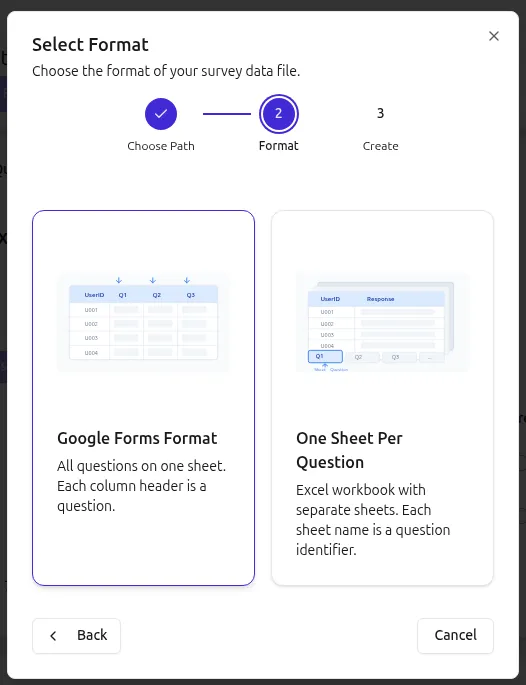
- Choose Google Forms Format
- Name your project
- Click Create
-
Upload your data file
- Click Upload File button and choose your file to analyze
- Supported formats: CSV, Excel (.xlsx, .xls) exported from Google Forms
-
Configure columns
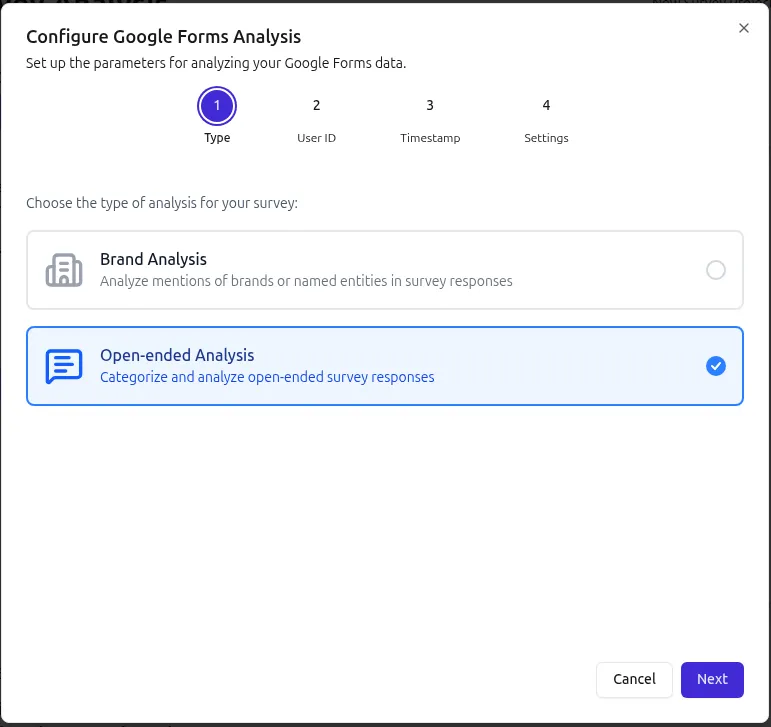
- After uploading, you’ll see the Configure Google Forms Analysis dialog
- Choose analysis type - Brand Analysis or Open-ended Response Analysis (see also Analysis Types)
- Select the column containing user ID (optional)
- Select the column containing timestamps (optional)

-
Configure analysis options
- Next, you’ll see the last step of the Configure Google Forms Analysis wizard
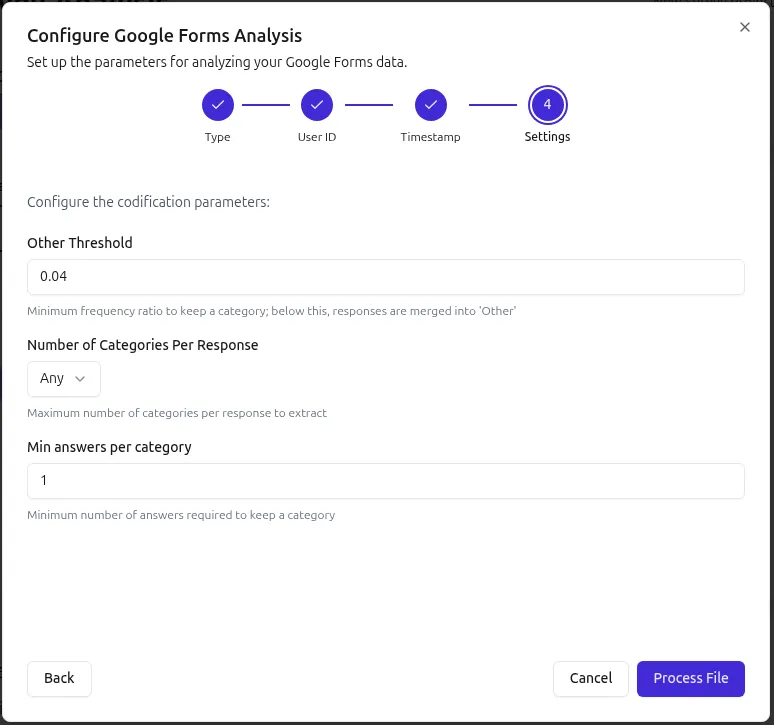
- Review the default settings
- Adjust parameters if needed (see also Analysis Settings)
- Click Process file
- Next, you’ll see the last step of the Configure Google Forms Analysis wizard
How to Set Up Survey Analysis (Custom Format)
Section titled “How to Set Up Survey Analysis (Custom Format)”-
Create a Survey Analysis project
- Click Survey Analysis in the navigation bar
- Click New Project
- Choose Create from scratch
- Choose One sheet per question
- Name your project
- Click Create
-
Upload your data file
- Click Upload File button and choose your file to analyze
- Supported file formats: CSV, Excel (.xlsx, .xls)
- Detailed format description see below
-
Configure columns
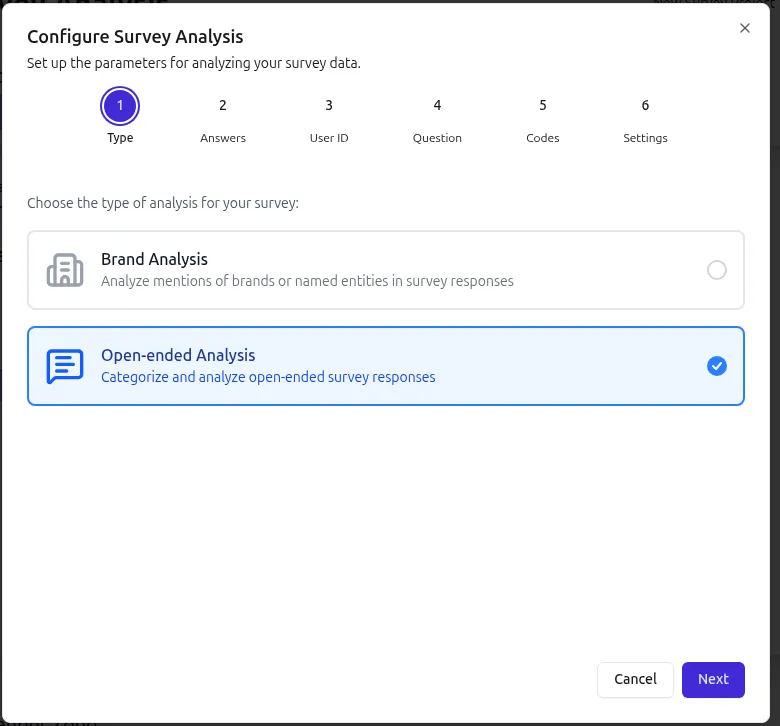
- After uploading, you’ll see the Configure Survey Analysis dialog
- Choose analysis type - Brand Analysis or Open-ended Response Analysis (see also Analysis Types)
- Select the column containing the response
- Select the column containing user ID (optional)
- Select the column containing the question. You can enter the question or choose from a template (see also Templates & Codes Guide)
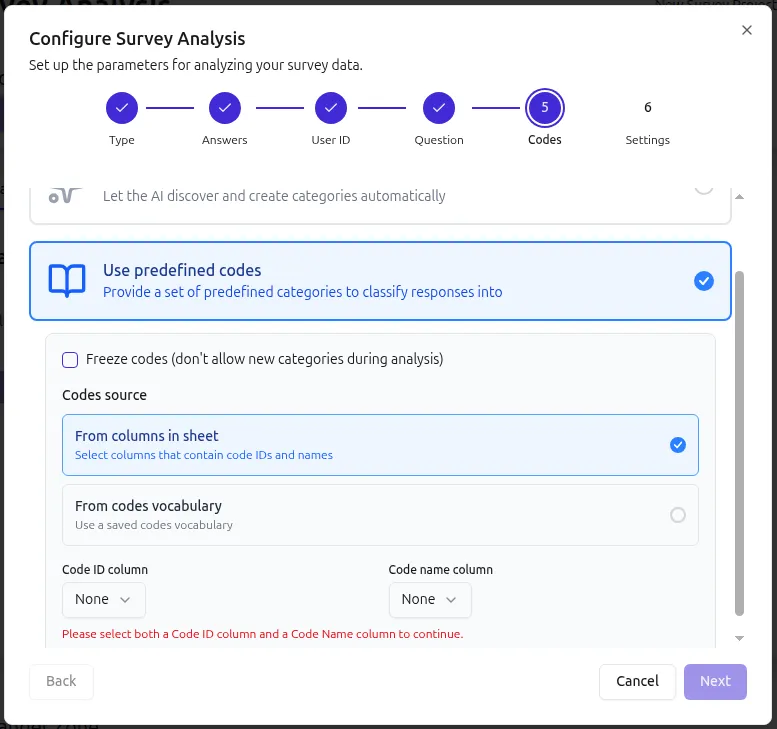
- Choose pre-defined codes (optional). You can choose from a predefined vocabulary or from columns.
-
Configure analysis options
- Next, you’ll see the last step of the Configure Survey Analysis wizard
- Review the default settings
- Adjust parameters if needed (see also Analysis Settings)
- Optionally, freeze codes to prevent the AI from discovering new categories. This option is only available when you have selected pre-defined codes in the previous step.
- Click Process file
How to Set Up and Run Survey Analysis from Template
Section titled “How to Set Up and Run Survey Analysis from Template”-
Create a Survey Analysis project
- Click Survey Analysis in the navigation bar
- Click New Project
- Name your project
- Choose template name in the dropdown (see Templates & Codes Guide)
- Click Create
-
Upload your data file
- Click Upload File button and choose your file to analyze
- Supported file formats: CSV, Excel (.xlsx, .xls)
- Detailed format description see below
-
Configure analysis options
- Next, you’ll see the Configure Survey Analysis dialog
- Review the default settings
- Adjust if needed
- You don’t need to configure column names, they are already set in the template
- Click Save Settings
How to Run the Analysis and View Results
Section titled “How to Run the Analysis and View Results”-
Run the analysis
- Click Analyze
- Processing time depends on the number of responses
- Processing is done per question. Once processing is complete for a question, the Status will change to “Completed” on the corresponding row of the table
-
Review results
- View the results for each question in the table by clicking on the question row
- You will see a pie chart with category distribution
-
Download results
- Check all questions you want to review or download results for
- Click Export button
- Results are available as Excel (XLSX) or PowerPoint (PPTX) files
- Each response is coded with one or more category numbers